Once you have completed defining, building and testing your AutoRun you can use AutoRun Architect to burn your
project to a disc. AutoRun Architect can burn both CDs and DVDs.
To burn the project to disc click:
1. Click on the Burn button.
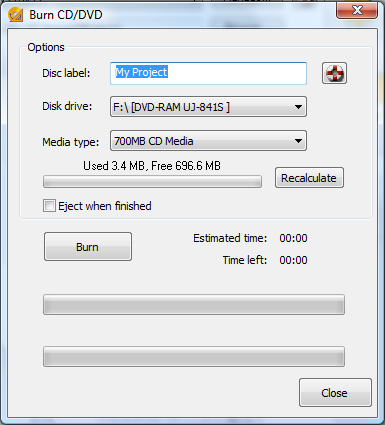
2. The Burn Dialog will appear.
3. Enter
the Disc label into the text box. It may be up to 15 characters. This label will be used as the name of the
CD in Windows Explorer for all versions of Windows up to and including Windows XP. From Windows Vista the
label is handled different and the label can be set in the General CD Properties.
4. Select the Disk drive. This is only relevant if you have multiple burners
on your computer.
5. Select the Media type. Generally the value will be 700MB CD Media. In
order to burn a DVD you will need to
have IMAPI V2.0 installed. This comes standard with Windows Vista and is available as an add on for Windows
XP from the Microsoft web site.
6. Ensure that there is enough room on the disc for all your files. If there are too
many files to burn you can make
changes to the files and click the Recalculate button to update the disc usage statistics.
7. Click the Eject when finished check box if you would like the disc to be
ejected when the burning is complete.
8. Ensure that there is a blank disc in the drive.
9. Click the Burn button.
10. The burn process will begin. As it proceeds the progress information will be updated.
11. When the process completes a message will be displayed.
12. Click Close
to return to the main AutoRun Architect interface.
NOTE:
In order to create an AutoRun that will run on computers other than your own, you must use a purchased version
of AutoRun Architect.
If you have not yet purchased and activated your version of AutoRun Architect then a dialog will appear
when you start
to run the AutoRun that says that the AutoRun was created with a trial version.
To purchase AutoRun Architect, choose Buy Now from the Purchase menu. To activate, choose Enter
Activation
Code from the Purchase menu.