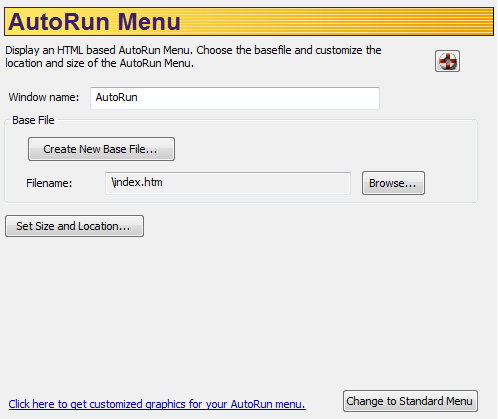
You can present an AutoRun Menu with buttons and graphics utilizing an HTML browser window, which you customize
by adding graphics and modifying the underlying HTML file. The menu will be displayed when the CD is inserted in the
drive.
AutoRun Architect will create a basic HTML file for the contents of the Autorun Window. You can then customize it to
give it your desired look and feel.
You can also set other properties for the window such as the name and define its size and location.
To define the Window’s name:
1. Enter a name in the Window name text box. This name will appear on the window
frame the task bar when the
AutoRun Menu window is open.
To create a basic HTML base file:
1. Click Create New Base File. The Create Graphic HTML Template File
dialog box is displayed.
2. Enter a name for the HTML file.
3. Browse to select a location for the file.
4. Click Save. The Graphic HTML Template file is created.
To select an existing base file:
1. Click Browse. The Select HTML Base File dialog box is displayed.
2. Select a name from the list
3. click Open.
To set the size and/or location for the AutoRun window:
If you would like to get customized graphics for the menu for your company or project click on the link Click
here to
get a customized graphics for your AutoRun menu.
Advanced Options
In order to view the advanced options for customizing the menu you need to be in Advanced mode. See Working with
Modes (Standard/Advanced) for mode information on switching modes.
In advanced mode you can also change the type of the AutoRun Menu to a Standard AutoRun Menu by clicking on
the Change to Standard Menu button. See Defining Standard AutoRun Menusfor
more information about defining
Standard AutoRun menus.