You can specify one or more directories on the CD to be searched exclusively for drivers. This is used by versions
of
Microsoft Windows from Windows XP and later when searching for a driver to install and is not part of the regular the
AutoRun operations.
To access the Driver Directories you can either:
·Select the Driver Directories option from the View menu.
or
·Click on the Drivers button on the left side of the main Autorun Architect. Please note: The Drivers
button will
only appear if you are in Advanced mode. See Working with Modes (Standard/Advanced)
for mode information
on switching modes.
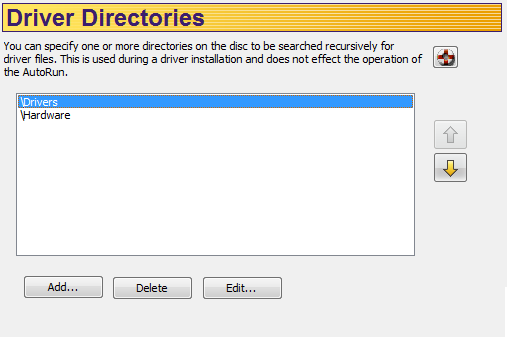
The Driver Directories will appear on the right side of the AutoRun Architect window:
To add a directory:
1. Click Add. The Driver Directory dialog box is displayed.
2. Select a directory for the drivers.
3. Click OK.
To delete a directory from the Driver list:
1. Select the directory from the list.
2. Click Delete. The directory is removed from the list.
To edit a directory from the Driver list:
1. Select the directory from the list.
2. Click Edit. The Driver Directory dialog box is displayed.
3. Select a directory for the drivers.
4. Click OK.
To change the order of the directories from the Driver list:
·Click the Up Arrow to move a file up in the list.
OR
·Click the Down Arrow to move a file down in the list.